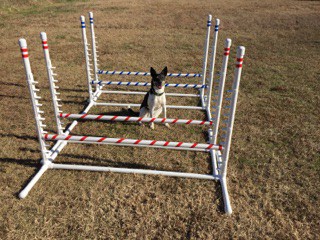
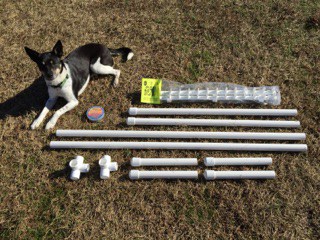
Material List for 1 Bar Jump (3′ tall x 4′ wide)
*Minus the 4-way connectors and jump cup strips, all material on hand at your area home improvement / hardware store. PVC pipe, end caps and T’s are in plumbing department; colored tape in electrical dept. I use a miter saw to cut my pieces but you can use a handheld pvc cutter, or your pvc source might cut it for you.
2 x 10′ pipes of 1″ pvc (schedule 40) cut as follows:
2 x 33.5″ pieces for the uprights (30″ if using T’s as connectors, see NOTE below)
2 x 48″ pieces for bars
4 x 11-12″ pieces for legs
6 x 1″ end caps for capping the legs and uprights
2 x 1″ 4-way connectors ( www.cleanrun.com or a source of pvc fittings)
*OR* 4 x 1″ T’s (instead of 4-ways you can use T’s, see NOTE below)
2 x 2″ pieces of pvc for connecting T’s, not required if using 4-ways
1 Pair Jump Cup Strips or other jump cups (www.cleanrun.com or other dog agility source)
Colored tape for wrapping the jump bar and uprights (electrical tape works great)
PVC glue (optional)
End of list, that’s all you need.

NOTE re: 4-ways vs Ts as connectors – I recently built jumps for a few students and I used 4-way connectors. The jumps work great as demonstrated above by Penelope in her test drive jump. However, all the other jumps I’ve made (some of which are 12 years old and still going strong) were made with T’s as connectors. This is because 4-ways weren’t on hand when I was ready to make jumps so I improvised using T’s. Now that I’ve compared these two models, I currently favor the jumps made with T’s for the following reason.
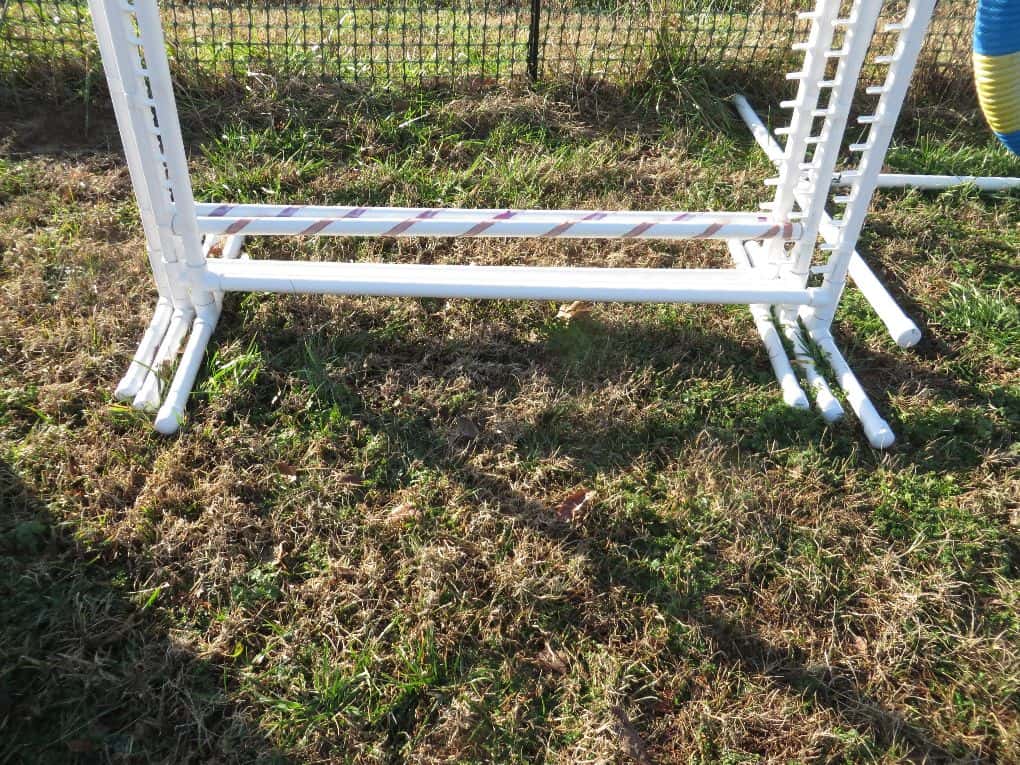
Use of Ts as connectors (shown in pics further below) allows the jumps to fit close together in a clean, space-saving fashion for transportation and or storage. Perhaps a non-issue if you need to move and or store only a few jumps, but a great feature if you have many jumps. Pics below compare nesting of jumps made with T’s (right pic) versus 4-ways (left pic) .

(FYI, a third option or model for bar jumps uses a 5-way connector and produces a jump with free-standing uprights, not shown in this post. Pros and cons to each of the three models.)
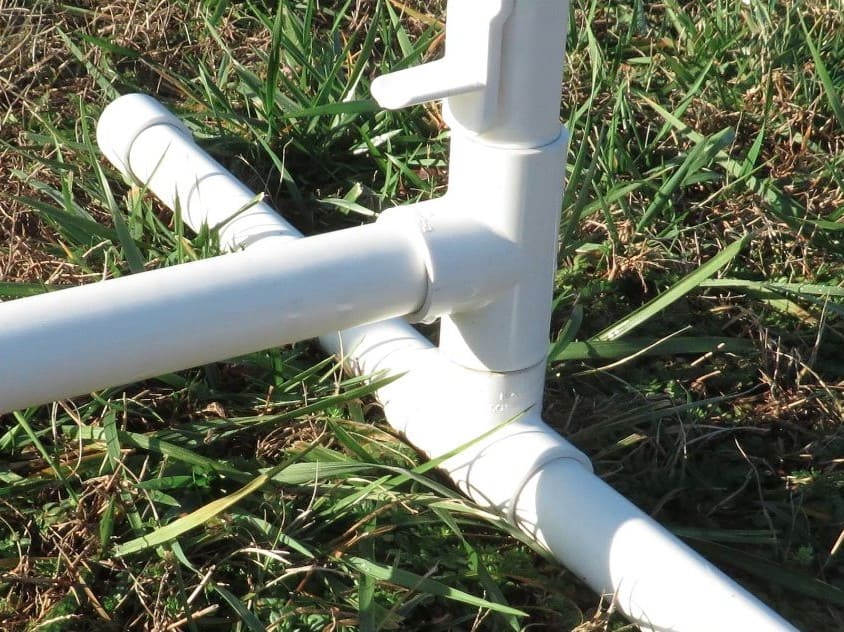 If using Ts to construct your jump, you’ll need to add 4 to the values printed on the jump cups. This is because the T connector displaces the strip 4″ higher on the upright.
For example, if the jump bar is placed on the jump cup reading 10″, the actual jump height is 14″.
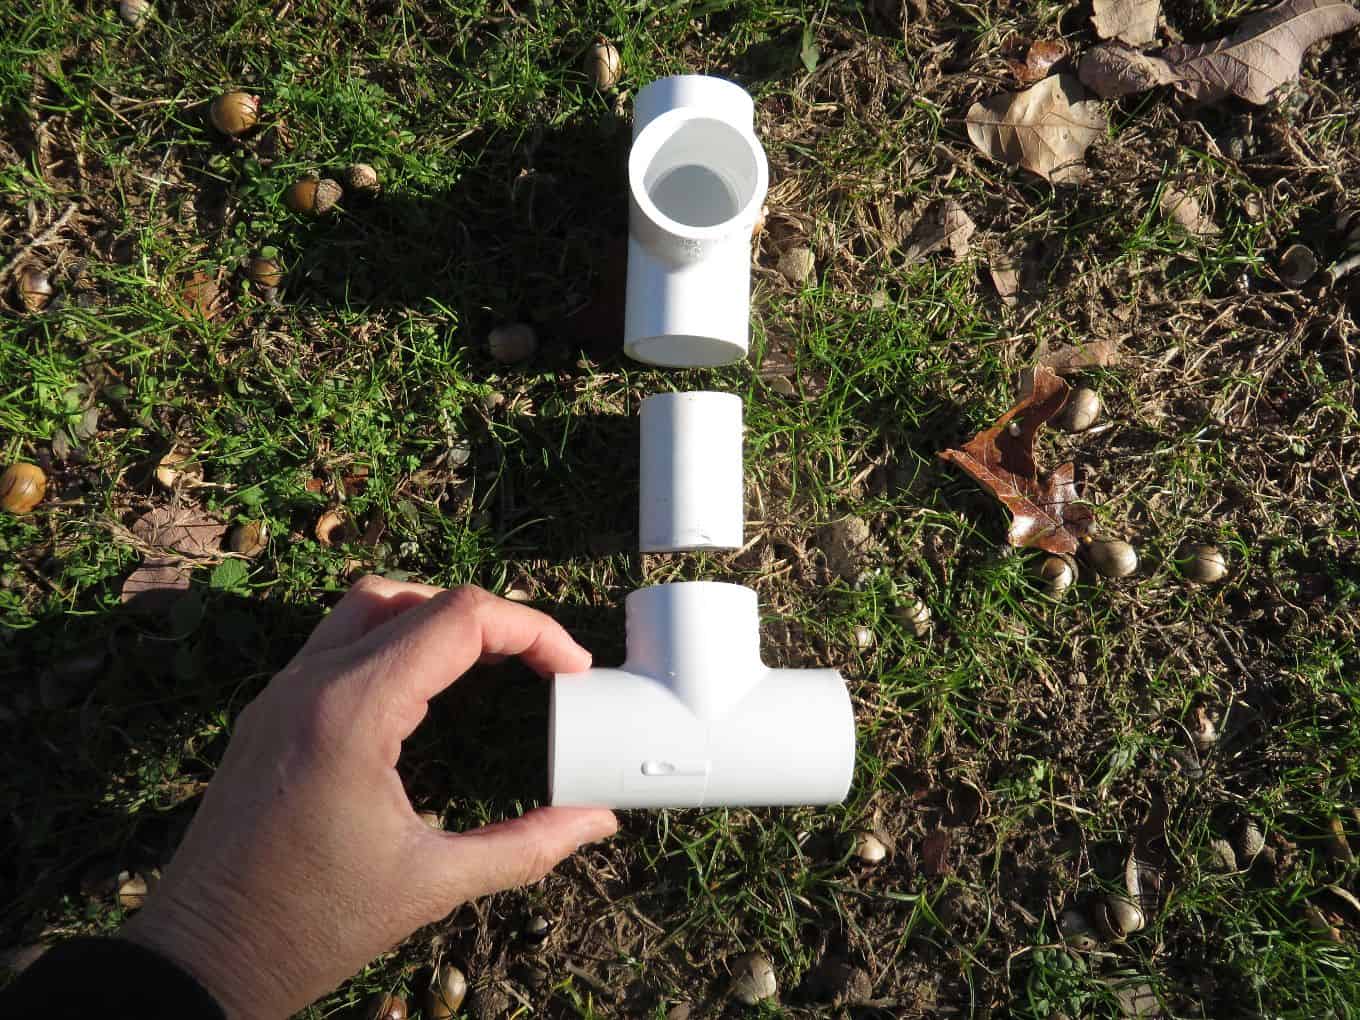
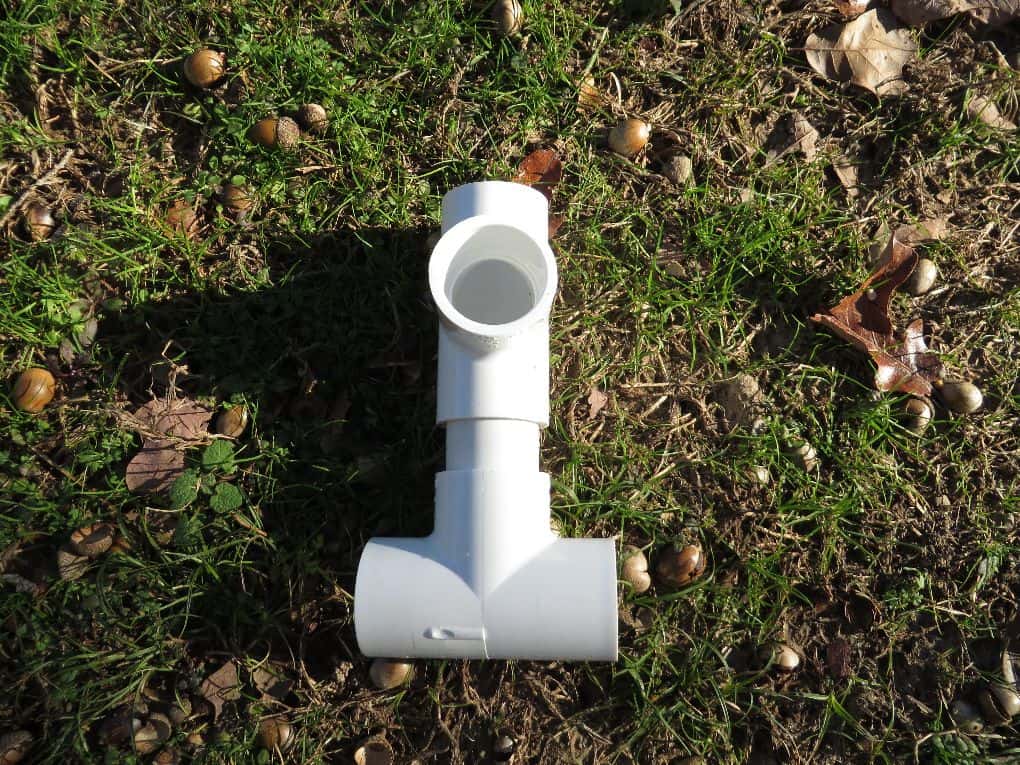
The pics below show how to connect two T’s in order to make a connector. Two connectors per jump.
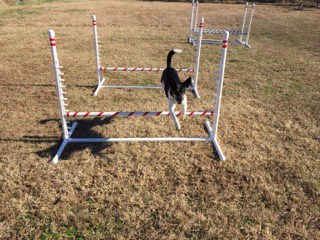
Whether 4-ways or T’s, assembling the jump is straight-forward. My favorite step is wrapping the jump bar with colored tape. It’s neat to see the pretty spiral emerge.
If you have any questions, just ask.
Enjoy your jumps, your learning and your dog!
~Mary & Posse
